Watercolour Effect and Worms Fuji XT20 X Trans III RAW Processing with Adobe Lightroom
The title of this article looks horrible, but this is a subject which is routinely discussed on the various Fujifilm camera forums. I’ve owned a number of Fuji cameras over the years and it’s always been the sluggish performance which has ruled them out for the work I do. However, recent iterations have sorted that out and I’m now the owner of an XT20.
X Trans sensors are prone to certain anomalies which become more or less evident depending on the software you use to convert and process your RAW files. Broadly speaking these anomalies are reported as worm artefacts and a loss of acuity in structures with fine details such as foliage or rocks. Regarding the latter, in my experience this relates to areas of detail in the mid to further reaches of the scene rather than closer subjects. The X Trans JPEG files also show the problem, along with waxy skin as ISO increases.
Fuji X Trans Worm Artefacts
Worm artefacts are likely to appear as your ISO goes up, or in areas of fine detail. Worms can become problematic when we sharpen our files, most notably in Adobe Lightroom and Camera RAW (in fact all processing engines will show worms to some extent in X Trans files). I’m a full-time Lightroom user – it’s a one-stop solution for everything from RAW conversion, keywording, cataloguing, processing, print output, to slideshows. For professional photographers it remains the industry standard. Like many professionals, it makes no sense for me to adopt an alternative workflow simply to suit the vagaries of one particular camera brand. Nor is there room in my very long working days to adopt a hybrid workflow, which amounts to using an alternative DNG converter purely for the Fuji film RAW files. For me, it starts and ends with Lightroom.
When we sharpen our RAW files during the processing stage, it’s normal to apply a small amount of capture sharpening. This simply restores the detail in your RAW image, which is naturally a little soft at the outset. Capture sharpening should be as minimal as you can get away with, if you’re too aggressive with this you might create problems for yourself later on. Output sharpening relates to the sharpening you apply before you print – and the amount will vary depending on the size of your print and the substrate. Sharpening is rarely required for screen/web viewing at low resolutions – particularly if you have a high-resolution monitor.
Sharpening and X Trans RAW Files
Capture sharpening can vary according to the type of photograph and the tastes of the photographer. But in general my view is that the Amount slider in Lightroom should never be extended beyond about 45, and probably not beyond 35 with X Trans images. Why? Because it’s an incredibly potent tool and the result will be a degree of artefacting – in fact you’ll see that irrespective of your camera brand. You can easily see this for yourself by zooming in to 100% or even 200% and slowly dragging the Amount slider. Look at what happens – even a small sprinkling of noise at base ISO, or small details, will start to look unattractive. Some camera brands have quite distinct noise characteristics, and Fuji’s looks like bacteria or small worms. The Sony sensors on my Panasonic cameras are a bit like grains of rice. My Olympus cameras show grittiness and some clumping when the Amount slider is pushed. X Trans photographs exhibit artefacts at lower levels of sharpening when compared to other cameras.
To mitigate this, my capture sharpening is conservative, and I generally leave it at the Lightroom default. I’ve seen some fairly bold suggestions being made about how X Trans photographs should be sharpened in Lightroom, with aggressive use of the Detail and Radius sliders. I would disagree with that approach – it isn’t necessary and you’re not doing your images any favours. Additionally many photographers don’t notice artefacts and halos at all, and can interpret this as an increase in detail. When you do experiment with these sliders, holding down the Alt key will help you to see where the effect is being applied, and if it’s likely to be too much. Be cautious sharpening any image destined for monitor viewing, but you can be bolder with prints.
So the simple answer to reducing the impact of worms is to avoid cranking the Amount slider above about 30 – bearing in mind that the higher the ISO, the easier it will be to reveal artefacts. I apply minimal capture sharpening in Lightroom and my output sharpening is carried out either using Lightroom’s Export module (ideal for batch processing large numbers of images for clients or for album creation) or else I use Photoshop’s Smart Sharpen, USM, or High Pass Sharpen capability. Lightroom’s Export sharpening results in fewer worms then we might see in the Develop module, but they’re still there to a degree. I feel that Photoshop’s High Pass sharpening is the best method. For large prints I’ll carry out selective sharpening in Photoshop as usual.
So that you know what noise worms look like, here’s a snap of a corner of my office taken with the XT20 at ISO 6400. The (minimal) Lightroom default sharpening has been applied.
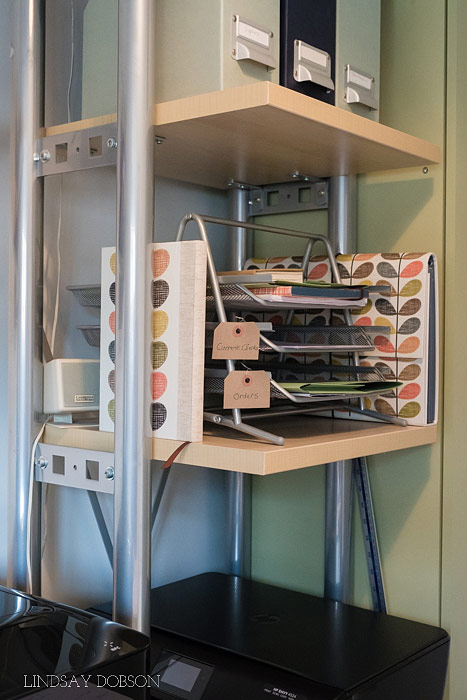
Scene Overview
It can be easier to spot noise worms in uniform out of focus areas, so here is a 100% crop. As you can see, the worms show themselves as a slightly elongated noise pattern. However using Lightroom’s default sharpening, the worms aren’t particularly offensive at modest output sizes:

XT20 ISO 6400 RAW, Crop

Olympus EM1 ISO 6400 RAW, Crop
A 100% crop amounts to a very large print – and I wouldn’t make huge prints from high ISO images. Nor would I sharpen high ISO images to the same extent as those with much lower ISO values. With a little bit of noise reduction both the images above would look quite respectable printed at 14 inches. But all large prints need some output sharpening, and some substrates (such as certain fine art papers) need more sharpening than others. This is where I’m cautious about incorporating any X Trans camera into my professional kitbag. After all, I specialize in large prints (prints of at least 30 inches).
Fuji X Trans Images Processed in Lightroom
I took my XT20 to the coast recently to take the kind of pictures which I would routinely capture on a personal outing. These photographs have been created at ISO 200, and their purpose is to see how much detail is revealed from the RAW file in Lightroom, under normal conditions.
The photographs below have been processed exactly as I normally would, with a Curve bump and Lightroom’s default sharpening. These are plenty sharp enough to my eyes and for Internet display you wouldn’t need to apply any further sharpening. I’ve also included some 100% crops – I’m impressed with the 18-55 lens which accompanied my XT20, it’s sharp with no hint of chromatic aberration. The pictures below were all shot at ISO 200 and f8. I’ve included tight crops of the pebble and seagull images:
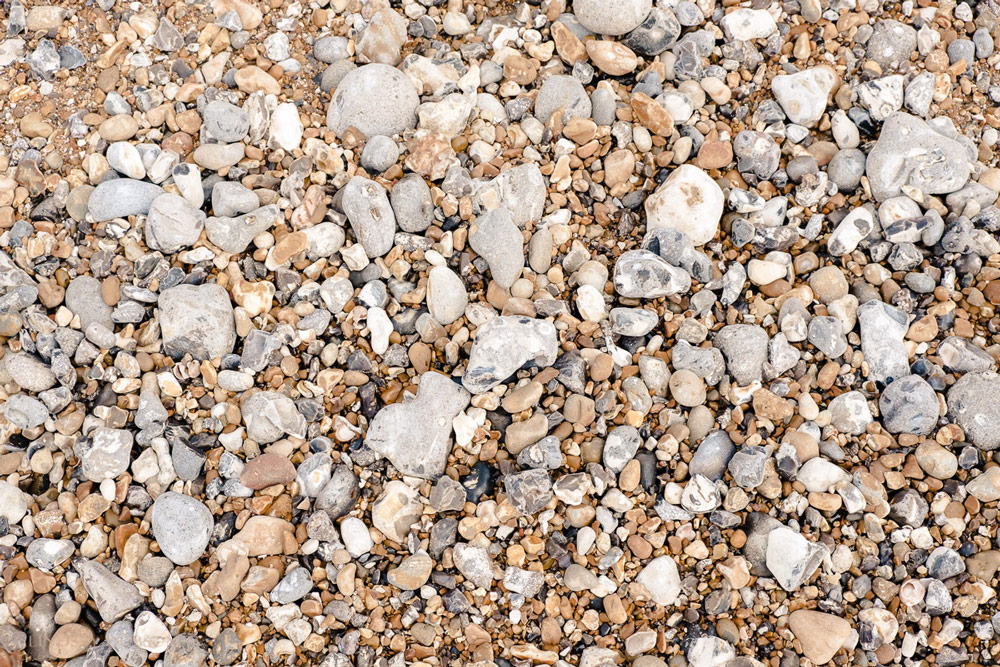


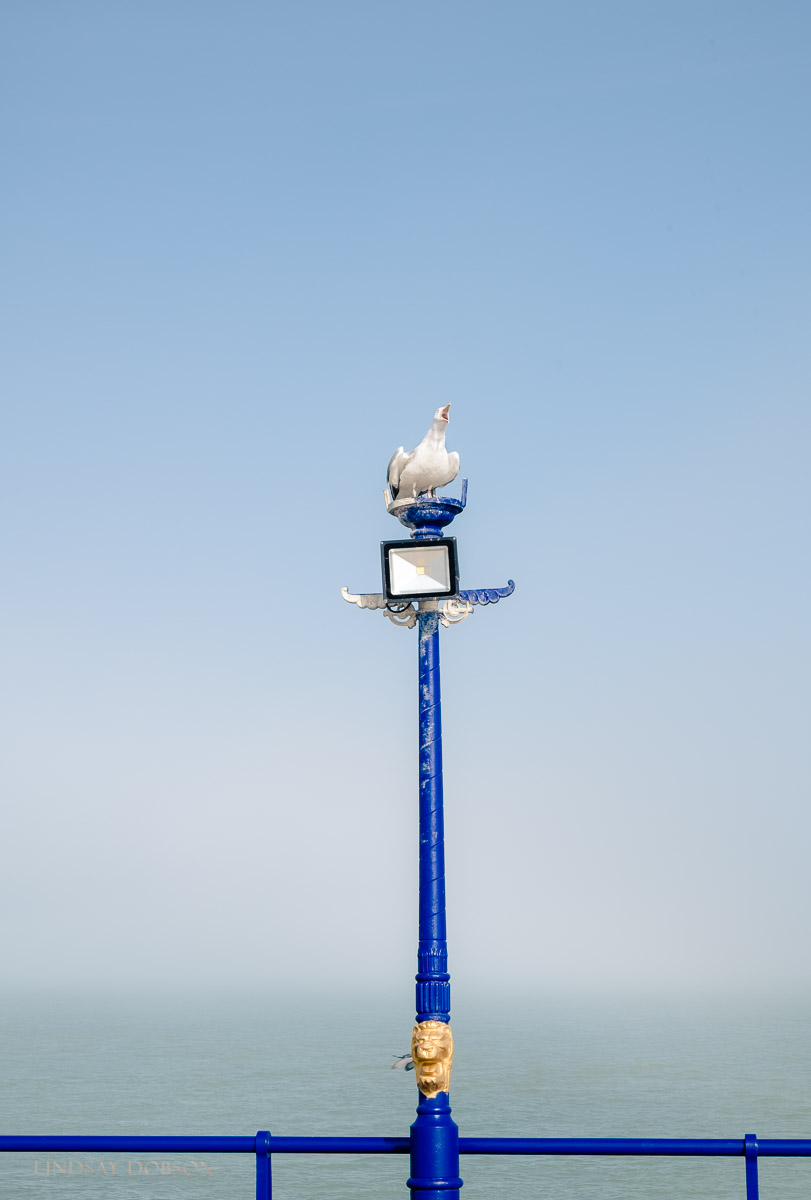


It’s clear to me that the detail in these photographs is very good – Lightroom has done a perfectly good job. If you do prefer an alternative RAW converter (Iridient, Silkypix, RAW Therapee, PhotoNinja etc) prior to import into Lightroom, then it’s very important to ensure that your starting point isn’t overly sharpened. This is another area where the examples I’ve seen online, or which have been sent to me, are often inappropriate. In Iridient I would choose to switch off all of the sharpening and noise reduction selections, if using the ‘more detailed’ option at the top. The ‘smoother’ alternative is likely to require a low sharpening value before output. I’d advise against falling into the trap of racking up sharpness in the belief it equals detail. Very often it doesn’t, but it does equal destruction. There is nothing worse than a crunchy over sharpened photograph.
Tip: unless you’re conducting an abstract exercise like this, avoid scrutinising your files at anything over 100% magnification. If you do, you’ll be at pixel level and everything will look pretty bad – you certainly won’t be able to assess your image for quality. If you’re concerned about how your image will look as a large print, resize the image, apply your chosen level of output sharpening for that size, and then crop out an 8 in.² from a crucial part of your picture. Print this, stick it on the wall, and look at it from your normal viewing distance. Only then decide if it’s good enough.
The X Trans Watercolour Effect - When Might this be a Problem?
This is broadly described as a mushiness and lack of acuity in areas of closely aligned details such as foliage or rocks. It can be most evident in the further reaches of your scene. If you try to sharpen this using a high Amount in Lightroom, in an attempt to reveal detail, you’ll likely see the worms discussed above. It’s important to remember that you’ll see sharpening artefacts on any image, from any camera brand, if you apply too much sharpening. The artefacts will simply look different from one manufacturer to the next. However X Trans files are more sensitive to sharpening than most.
Let’s see how well Lightroom handles images which may show this phenomenon. First of all, I’m going to look at near foliage, such as shrubs within 30 feet. To keep things in perspective I’ll do a comparison with my usual workhorse camera, my Panasonic GX8. The GX8 has an AA filter, but nevertheless turns out images with exceptional detail. I’ve paired it with the Pana 14-140II which is a fairly sharp zoom lens, despite its consumer description.
For the test I’m standardising the depth of field between the two sensor formats (in other words, I’m stopping down slightly on the Fuji) and I’m framing the scene in the same way using the same point of focus. ISO is the same as well. I’m then bringing the pictures into Lightroom as I usually would, where I’ll match the exposures if necessary. I haven’t applied any additional processing, other than Lightroom’s default capture sharpening which is Amount 25, Radius 1.0, Detail 25.
Tip: when you do foliage tests, do it on a still day without any wind. That sounds obvious, but it’s sometimes overlooked.
This is the overall shot, and the red dot indicates the point of focus:

Overall Scene


Overall Scene


Fuji X Trans Watercolour Effect & Worms Conclusions
I think the conclusion drawn from all of this is fairly clear. Lightroom appears to do a decent job at handling the X Trans RAW files in most circumstances. Lightroom’s sharpening tools need to be understood and in general leaving these at their default values makes sense. Output sharpening can be carried out as in Photoshop or your preferred sharpening software, which seems to create slightly fewer worms than within Lightroom.
All that said, I don’t like worms and this is one of the reasons why I have never been a fan of the X Trans sensor (particularly since Fuji’s Bayer technology is so good). I’ve also noticed some colour shifts here and there – notably magenta, and occasionally some ‘blocky’ artefacts.
The near foliage tests reveal little difference between the Panasonic GX8 and the Fuji XT20. There is a slight edge to the GX8. However my ‘far foliage’ tests performed in this post tell a different story: Fuji XT20 and Sony a6300 for Landscape Photography. For me, as an environmental portrait photographer, and as a photographer who enters a spectrum of work into industry competitions …. this is a deal breaker. But it might not be a deal breaker for you.
Finally – keep it real. If you see worms or smearing at 300% but not at 100% magnification then you have no reason to panic. If you have to look that closely to see a problem then you need to stop torturing yourself. We can find any number of things if we pixel peep to an extreme. We don’t print our photographs at a size equivalent to a 200% screen magnification – so it makes little sense to examine them that way. When you do examine your photographs this needs to be done at their native size – it’s impossible to evaluate an image sized down to less than 2000 pixels across. But if you are seeing artefacts at 100% view (which is how we traditionally examine pictures before we print) then you’ll need to re-evaluate your sharpening techniques. If that fails, then the Fuji X Trans system may not be a good choice for you.
UPDATE: roll on to November 2020 and I’m now enjoying Fuji’s fabulous Bayer sensor in the recently released XT200. To my eyes this bests X-Trans every time: Fuji XT200 vs Sony A7Riii High ISO Noise Tests